Outgoing Webhooks
Push real-time entity events from Custify to your own systems with signed, retried, observable HTTPS deliveries.
Overview
Outgoing Webhooks let your engineering team subscribe to changes that happen inside Custify and receive them as signed JSON payloads on your own HTTPS endpoints. Whenever a note is added on a Customer 360 Profile, a Task is updated, a Survey response comes in, or a Customer Portal link is created, Custify pushes the event to every endpoint that subscribed to it — no polling, no glue layers, no Zapier in the middle.
Who it's for: Engineering teams connecting Custify to data warehouses, BI pipelines, internal CS tooling, or backend automations that need to react in real time.
How it's different from Playbook webhooks: Playbook webhooks are configured inside a specific automation flow and fire as one step in that sequence. Outgoing Webhooks are independent: they fire on entity-level changes (created, updated, received), independent of any automation.
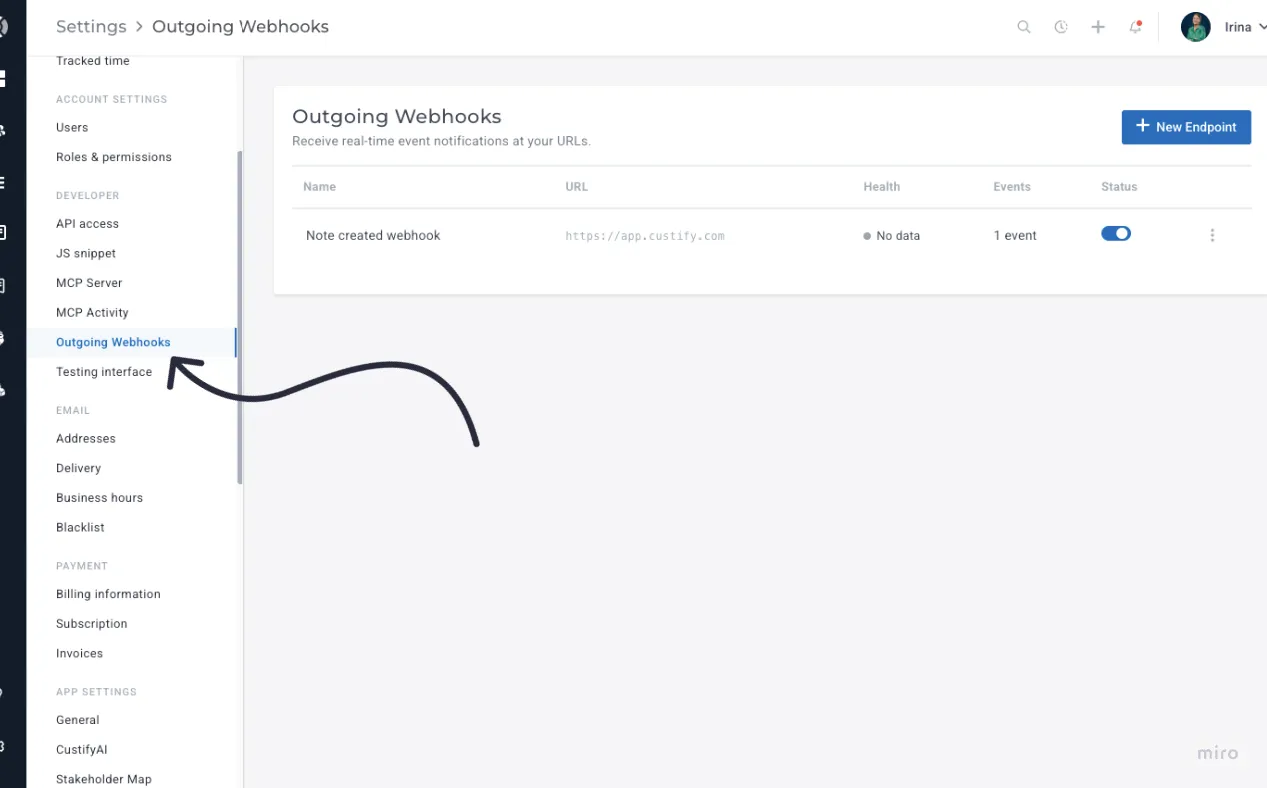
The capabilities you get from this module include:
- Configure multiple endpoints with their own URL, event subscriptions, custom headers, and signing secret
- Subscribe to a defined catalog of entity events covering notes, Tasks, Surveys, and Customer Portal links
- Sign every payload with HMAC-SHA256, so your receiver can verify authenticity
- Retry failed deliveries automatically with exponential backoff (up to 5 attempts)
- Auto-disable broken endpoints after 50 consecutive failures
- Inspect every delivery in a built-in log with request and response bodies
- Send a test payload from the UI to validate your endpoint setup
Custify Tip: Outgoing Webhooks are most useful when your team already has a backend service that owns the source of truth for customer data. If your goal is to push customer attributes back into a CRM, the Integrations you have configured may be a simpler route. Use webhooks when you need raw event data delivered as it happens.
Creating a webhook endpoint
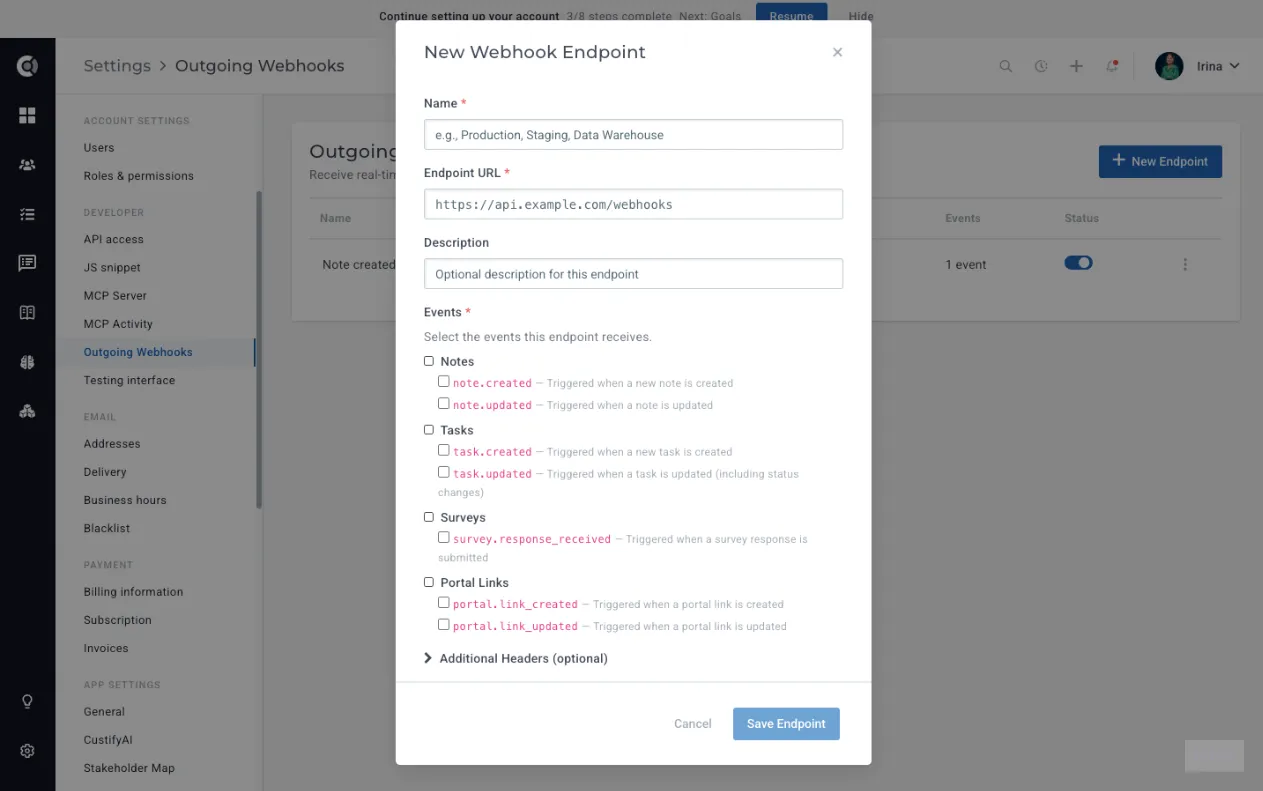
To configure your first endpoint, navigate to Settings - Developer - Outgoing Webhooks and click New Endpoint. The creation modal walks you through four sections: identity, destination, event subscriptions, and custom headers.
The fields you fill in during creation are:
- Name: A short label that identifies this endpoint in the list and in delivery logs. Use something descriptive like "Data warehouse sync" or "Internal CS dashboard."
- Destination URL: The HTTPS URL Custify will POST payloads to. HTTP URLs are rejected — your endpoint must terminate TLS. Localhost URLs are not accepted in production.
- Subscribed events: A checkbox list of every event you want this endpoint to receive. You can subscribe to as many or as few as you need; events that are not checked are simply not delivered.
- Custom headers: Optional key/value pairs added to every outgoing request. Common uses are an Authorization token for your own server, a routing tag, or a tenant identifier.
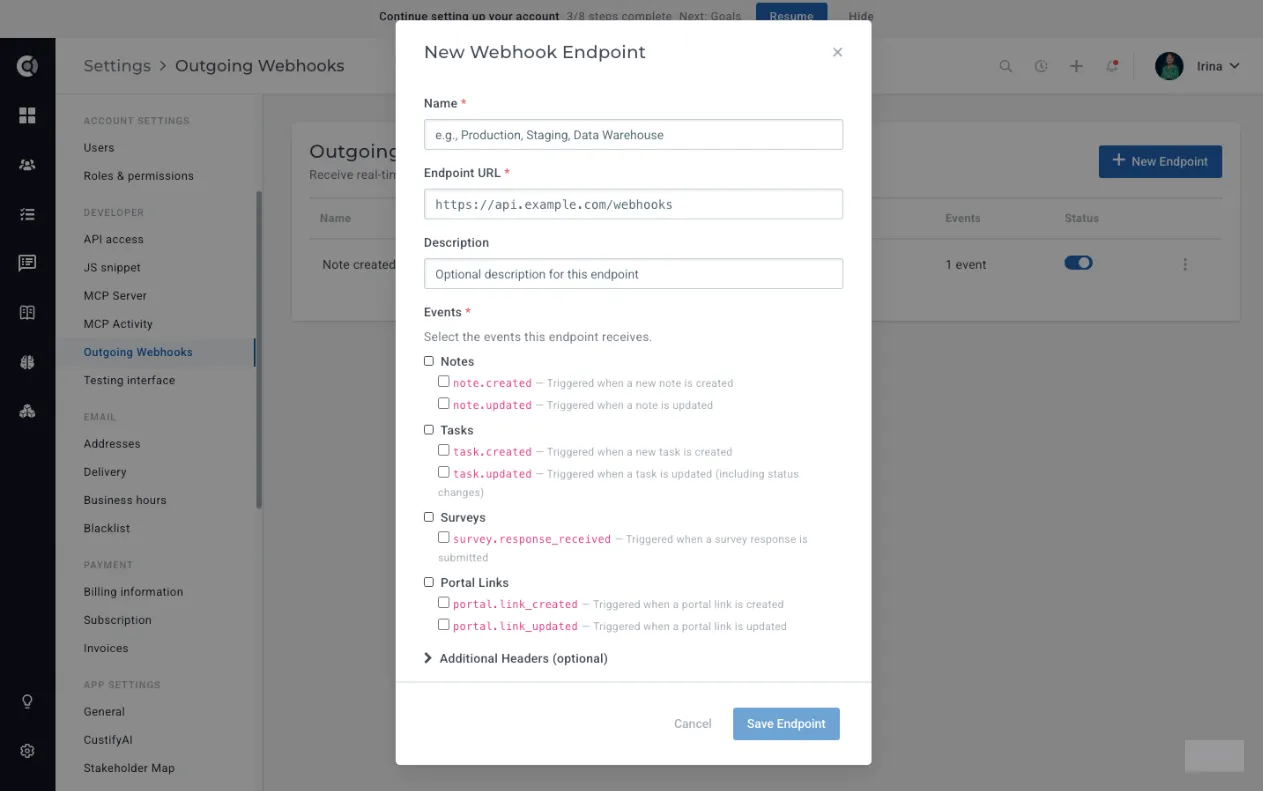
Once you click Save Endpoint, Custify generates a signing secret and displays it once in a one-time reveal panel. Copy this secret immediately into your secret manager. After you close the modal, the secret is masked everywhere in the UI and cannot be retrieved — only rotated.
Observation: The signing secret is shown only at creation time and after a rotation. If you lose it before saving it on your side, you will need to regenerate the secret, which invalidates the old one within the rotation window. Plan to capture it as part of your endpoint setup procedure.
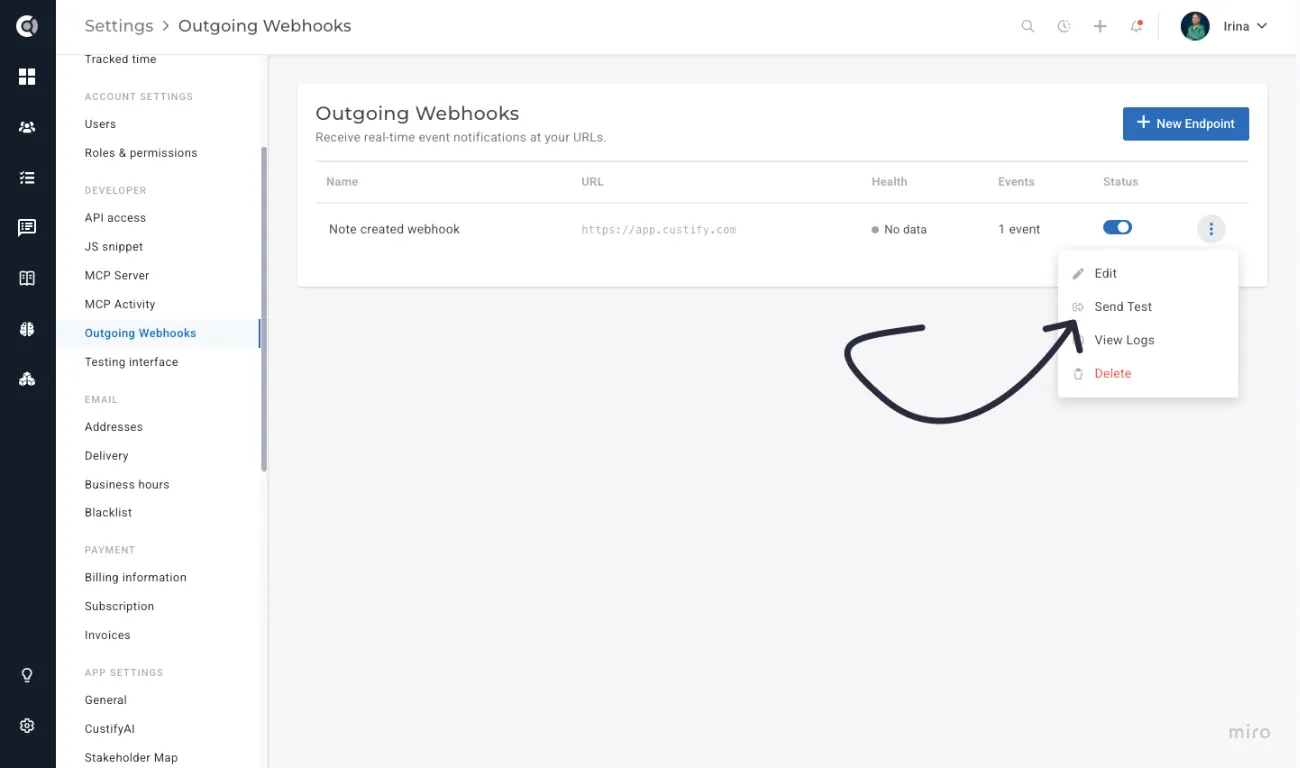
After saving, your new endpoint appears in the list with a status toggle, a health indicator, and an action menu. Click Send Test on the row to dispatch a test.ping payload to your URL — this is the fastest way to confirm your receiver is reachable and your custom headers are wired correctly before you depend on real events.
Custify Tip: You need the settings.manage_app permission to create, edit, delete, or toggle endpoints. Users with settings.view_data can open Settings - Developer - Outgoing Webhooks and inspect endpoints and delivery logs, but they cannot make changes. Review your role configuration under Settings before rolling this out to a wider team.
Subscribed events and payload format
The event catalog is organized by the entity that changed. The current set of events you can subscribe to is:
- note.created / note.updated — fired when a note is added or modified on a company or person record, including notes posted by a playbook step
- task.created / task.updated — fired when a Task is created or its fields change (status, assignee, due date, priority, tags)
- survey.response_received — fired when a Survey response (NPS or CSAT) is recorded on a person's profile
- portal.link_created / portal.link_updated — fired when a Customer Portal link is generated, or its template/configuration is changed
Every payload follows the same envelope. The body is a JSON object with a top-level id, type, created_at, account_id, and a data field containing the entity itself. The shape of data matches the same structure you would see for that entity through the API, so anything you already do with Sending Data to Custify and the public API will feel familiar on the receiving side.
Every request also carries a fixed set of HTTP headers. The headers Custify always sends include:
- Content-Type: Always application/json; charset=utf-8
- X-Custify-Signature: The HMAC-SHA256 signature of the raw request body
- X-Custify-Event: The event type string (for example, task.updated)
- X-Custify-Delivery: A unique delivery ID you can use for idempotency on your side
Observation: X-Custify-Signature and Content-Type are reserved headers. If you add a custom header with the same name in the endpoint configuration, the reserved value wins, and your override is silently dropped. This is intentional — it guarantees that signature verification on your side never breaks because of a misconfigured custom header.
Verifying signatures
Every payload is signed with HMAC-SHA256 using your endpoint's signing secret as the key and the raw request body as the message. Your receiver should compute the same signature on its side and compare it to the value in X-Custify-Signature before trusting the payload.
The verification flow your endpoint should follow is straightforward:
- Read the raw request body as bytes (do not parse and re-serialize the JSON — whitespace differences will break the comparison).
- Compute HMAC-SHA256(secret, raw_body) and hex-encode the result.
- Compare it to the X-Custify-Signature header using a constant-time comparison.
- If they match, process the event. If they do not, return a 4xx response and do not act on the payload.
When you need to rotate the secret — for example, after a team member with access leaves — open the endpoint and click Rotate Secret. Custify generates a new secret, shows it once, and keeps the previous secret valid for a 24-hour rotation window. During those 24 hours, signatures generated with either secret are accepted, which gives you time to deploy the new secret to your receiver without missing deliveries. After the window closes, only the new secret is valid.
Treat your signing secret like a production credential. Anyone who holds it can forge payloads that pass your verification check. Store it in your secret manager, scope access tightly, and rotate it any time you suspect it has been exposed.
Delivery, retries, and health
When an event fires, Custify dispatches it to every active endpoint subscribed to it. A delivery is considered successful when your receiver returns a 2xx response within the timeout window. Any other outcome — a 4xx, a 5xx, a connection refused, a TLS handshake failure, or a timeout — is treated as a failure and queued for retry.
The retry schedule follows an exponential backoff. Custify retries up to 5 times, with delays growing from 1 minute to 12 hours between attempts. Once the 5 retries are exhausted, the delivery is marked as permanently failed and stays in the log for manual retry. Each endpoint also tracks a rolling consecutive-failure count. When that count reaches 50, the endpoint is automatically disabled and its health badge flips to Failing.
The health indicator on each endpoint reflects recent delivery behavior:
- Healthy (green): Recent deliveries are succeeding
- Degraded (amber): Some recent deliveries are failing, but the endpoint is still active
- Failing (red): The endpoint has hit the auto-disable threshold and is no longer receiving deliveries
- No data: The endpoint is new or has not received any events yet
Observation: When an endpoint auto-disables, queued events are not held forever. New events that fire while the endpoint is disabled are not delivered and are not replayed when you re-enable it. If you need to backfill, query the relevant entities through the API after fixing the receiver and bringing the endpoint back online.
To bring a disabled endpoint back, fix the underlying issue on your receiver, then toggle the endpoint on again. The consecutive-failure counter resets on the first successful delivery after re-enabling.
Managing endpoints and viewing delivery logs
Each endpoint row in Settings - Developer - Outgoing Webhooks exposes the management actions you need day to day. From the action menu you can edit the endpoint, rotate its secret, disable it temporarily with the status toggle, or delete it.
To see what is actually happening on the wire, click Delivery Logs on the endpoint row or open the central log under Settings - Developer - Outgoing Webhooks - View Logs. The log lists every delivery attempt with its event type, timestamp, response code, response time, and final status (delivered, retrying, or failed). Click any entry to expand the full request body, response body, response headers, and the timeline of retry attempts.
For any failed delivery, click Retry in the detail panel to dispatch the same payload again. This is useful when you have already fixed your receiver and want to replay a specific event without waiting for a fresh one to occur.
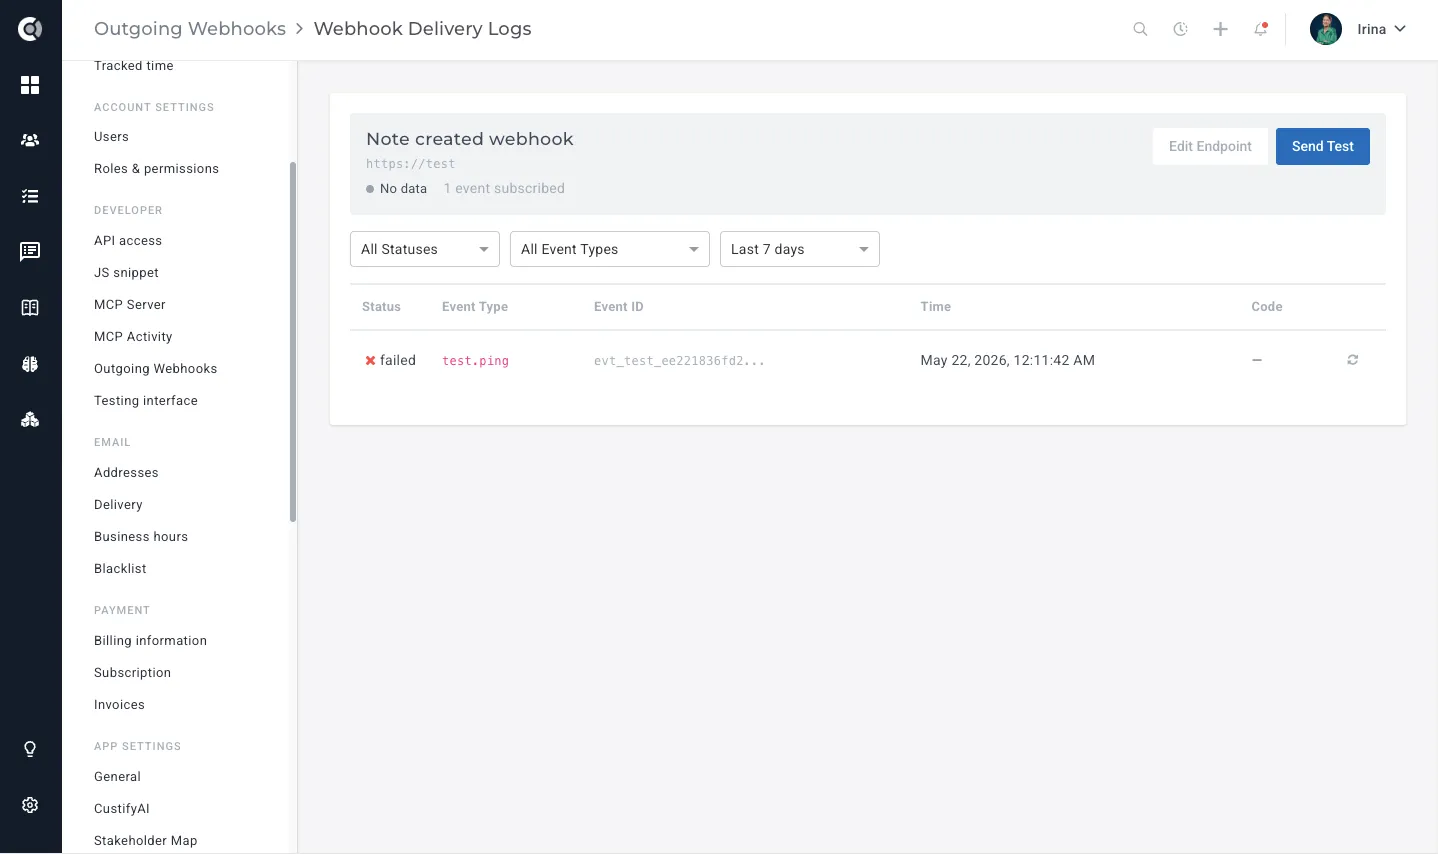
Delivery logs are retained for 14 days. Older entries are automatically cleaned up, so if you need a longer audit trail, forward the events into your own log store or warehouse from the receiver.
Observation: Deleting an endpoint immediately stops all deliveries to that URL and removes the signing secret. Deleted endpoints cannot be restored. If you only want to pause deliveries while you investigate an issue on your side, use the status toggle instead — that way, the endpoint configuration, signing secret, and recent delivery logs remain intact.